
Have you ever had a hard time importing large volumes of data into Salesforce? You are not alone.
The issue of data imports is an aspect that Salesforce admins and developers seem to find difficult, such as field mapping, error handling, and record addition and updating. The positive side is that Smart Lookup Data Loader will ensure that data imports are made easy, fast, and without any headache.
It is an effective application that is meant to automate the importing, updating, and upserting of your Salesforce data, saving you hours of labor and minimizing the chances of mistakes. Today, in this blog post, we will show you how to use Smart Lookup Data Loader to easily add data in Salesforce, the main advantages of this tool, and why it is an indispensable resource for every Salesforce administrator.
Why Smart Lookup Data Loader Is the Best Choice for Salesforce Imports
Smart Lookup Data Loader is a free application on Salesforce AppExchange that can be used to help ease the work of loading data into Salesforce. No matter what type of import you are operating, whether you are updating an existing database or loading a large batch of data, Smart Lookup Data Loader will enable you to:
- Automate field mapping: Automatically map CSV fields to Salesforce objects.
- Easily update or add new records: Duplicates need not be feared with upserts; it is easy both to update or add records.
- Ensure data accuracy: Inbuilt validation assists you in preventing frequent data import errors.
- Save time: Importation that would have taken hours can now be done in minutes.
How to Use Smart Lookup Data Loader to Import Data
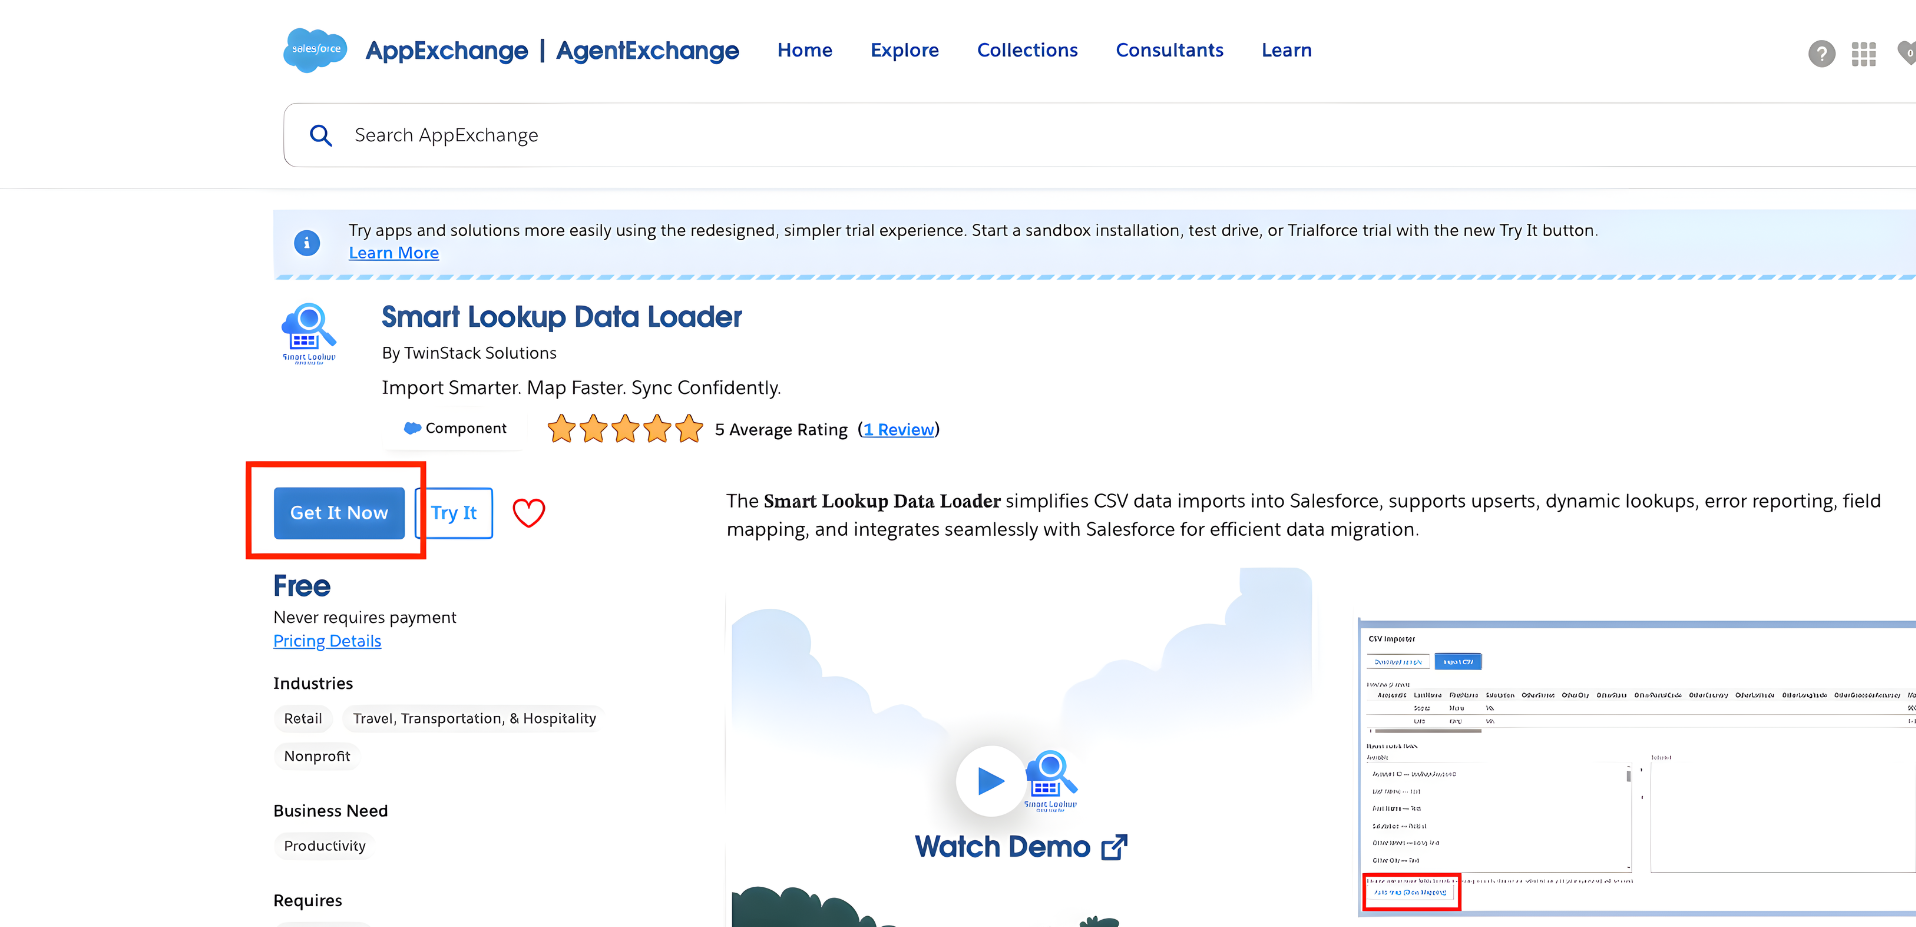
Step 1: Install Smart Lookup Data Loader
The initial step is to install Smart Lookup Data Loader in your Salesforce. Having finished the installation, you will have a tab in Salesforce for the tool, and you will easily access it without any further configuration.
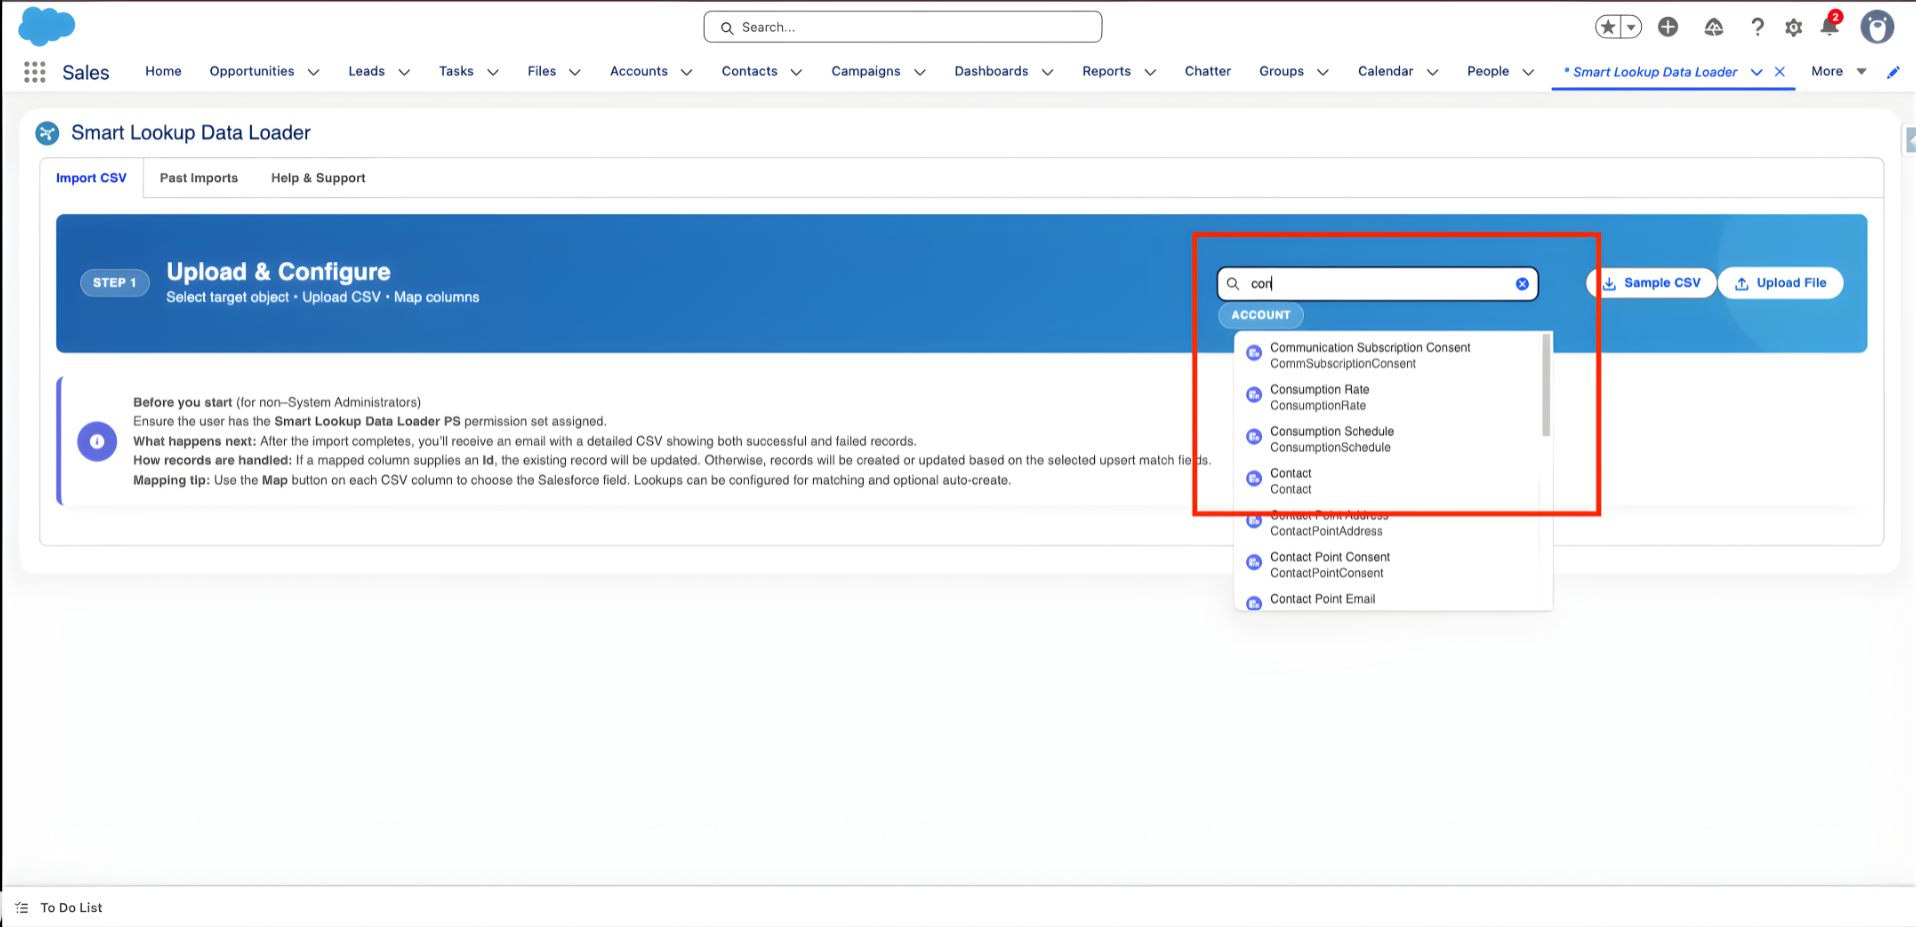
Step 2: Select Your Object for Data Import
When you are in the Smart Lookup Data Loader window tab, you have to choose the object into which you wish to import data. You can target the right data container in Salesforce whether you are working with standard Salesforce objects such as Contacts or Accounts or a custom object you have created.
The tool will show a list of Salesforce objects and you just have to pick the one that fits your data import requirements. It is easy to channel your data to the appropriate place in your Salesforce environment.
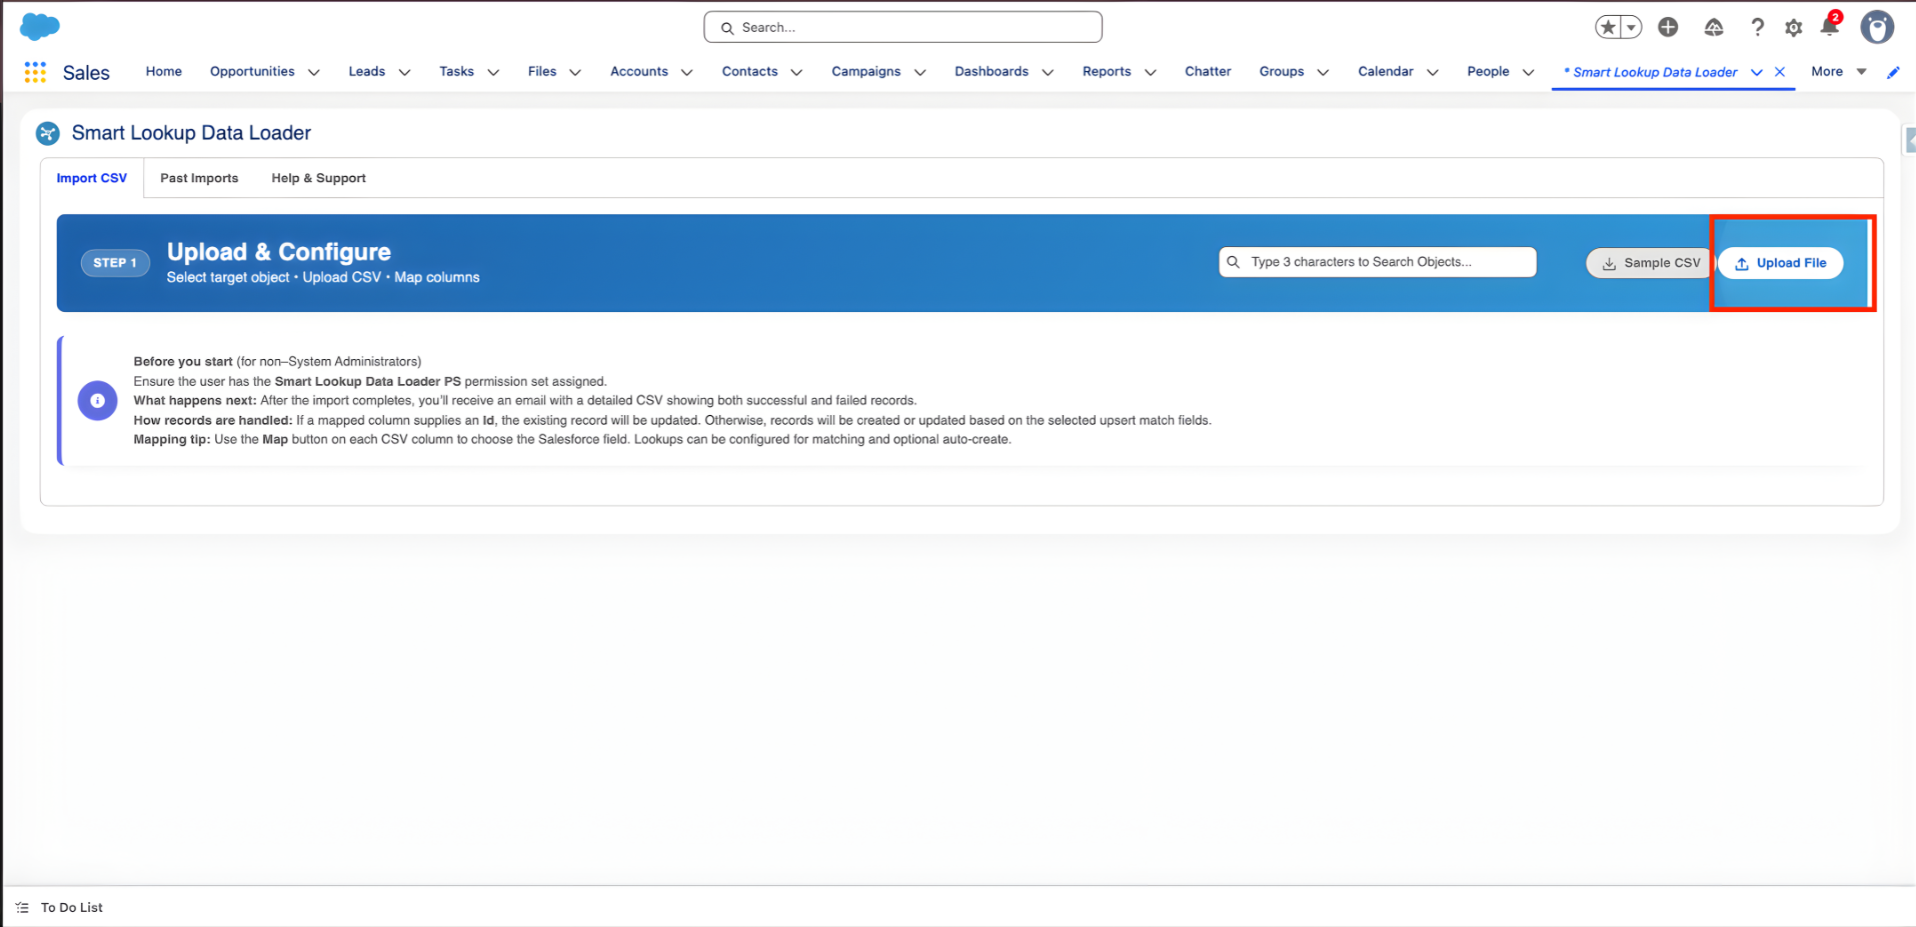
Step 3: Prepare Your CSV File for Import
You will have to prepare your CSV file before uploading your data. This is one of the most important steps in the process since the tool has to map the CSV columns to Salesforce fields.
- Proper Structure: Make sure that your CSV file is properly structured: Each column must be a Salesforce field (e.g., first name, last name, email).
- Data Check: Confirm the absence of incorrect data. It is necessary to check all the necessary fields of the file to avoid errors in the import process.
When you have your CSV file ready, you are able to upload it to the Smart Lookup Data Loader.

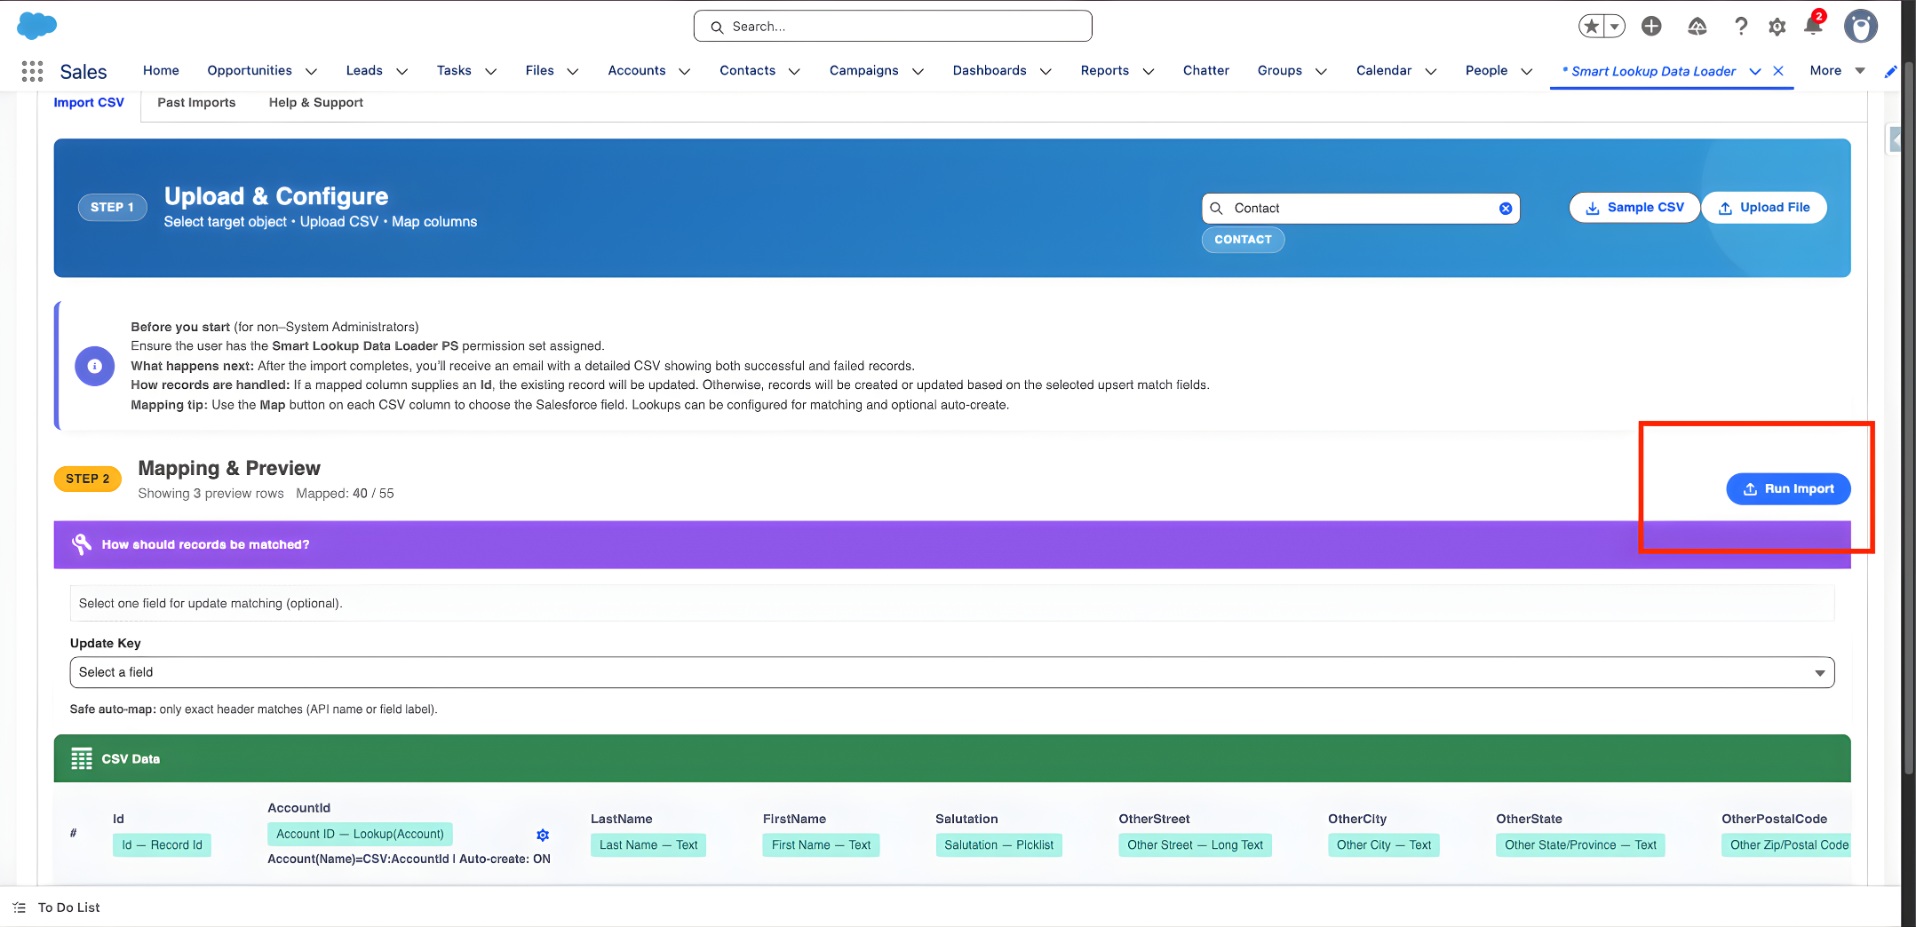
Step 4: Map Your CSV Fields to Salesforce Fields
The Smart Lookup Data Loader eliminates the guesswork in field mapping by differentiating and matching Salesforce fields with the CSV column headings. Mappings might be required to be manually edited in certain situations where the tool is unable to determine a match.
This is done easily and fast with the tool having a simple interface which displays the CSV column and the Salesforce field. The only thing that you have to do is to confirm the mappings and go.

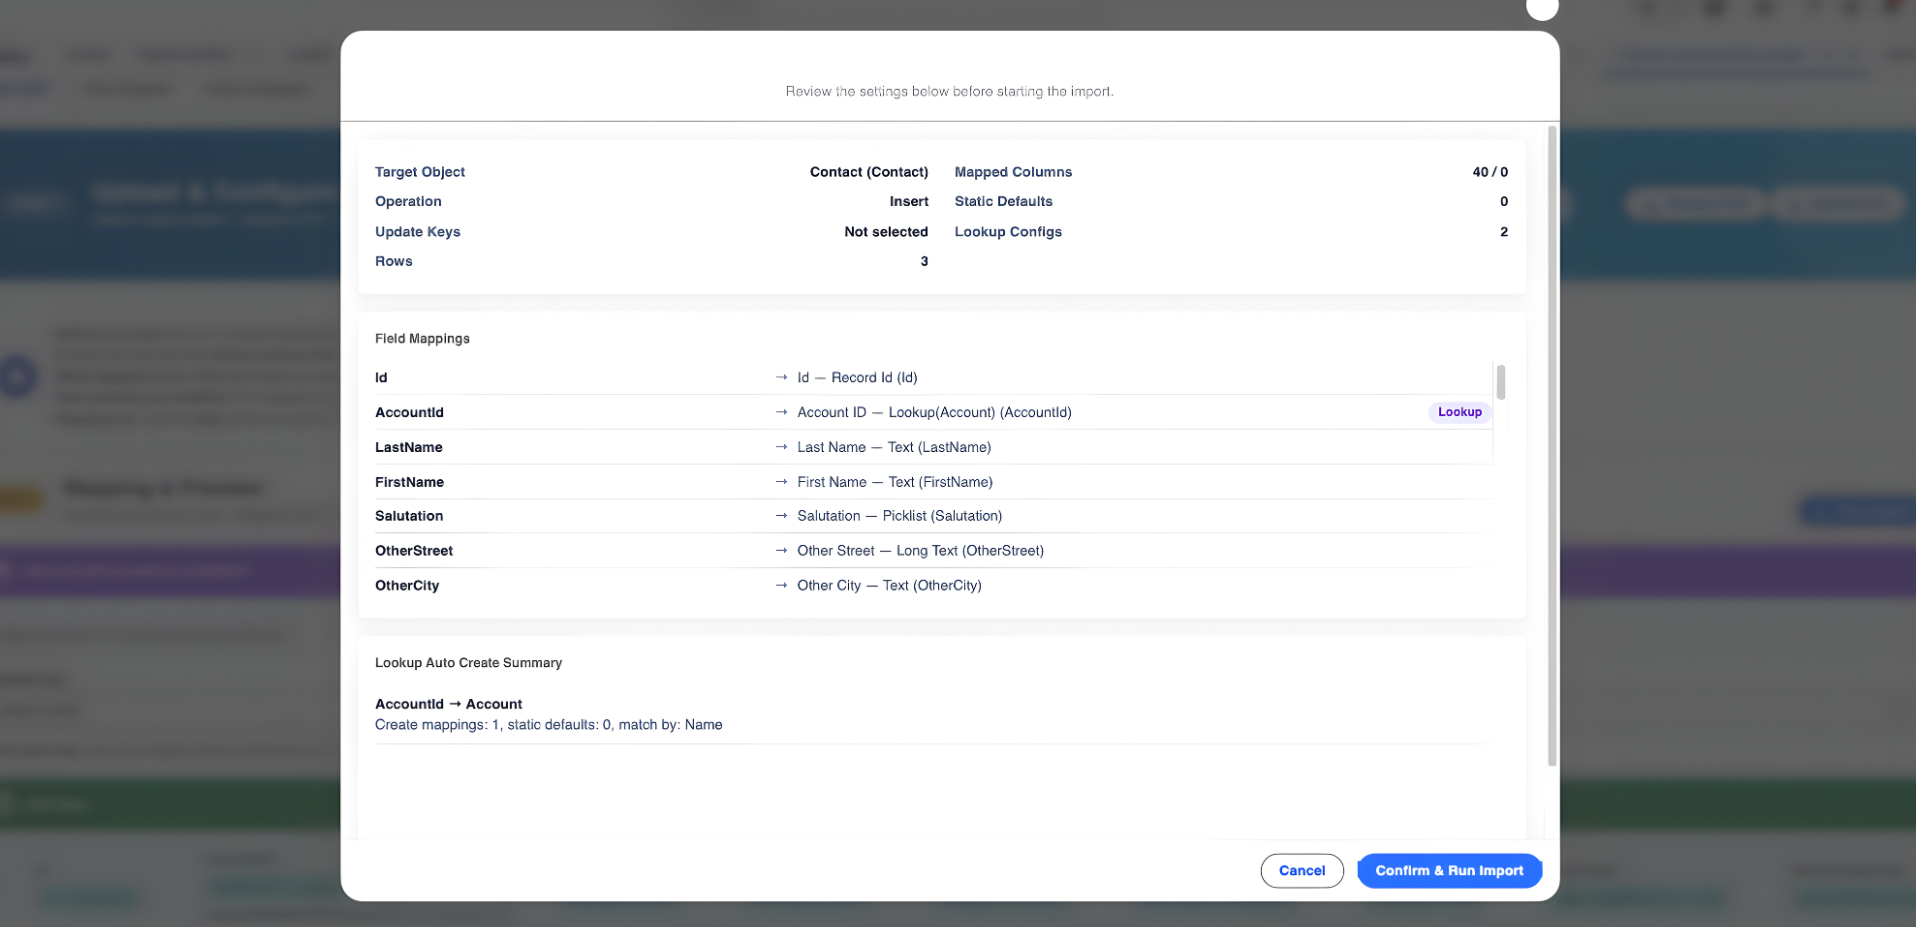
Step 5: Start the Import Process
After you have confirmed the mappings in your fields, you can now proceed to the importing. All you need to do is to push the button called Start Import and the Smart Lookup Data Loader will start working with your data.
The tool will automatically verify the presence of duplicates and update existing records when needed (upsert). In case of any errors, the tool will indicate a detailed log at a glance to enable one to correct the errors easily.
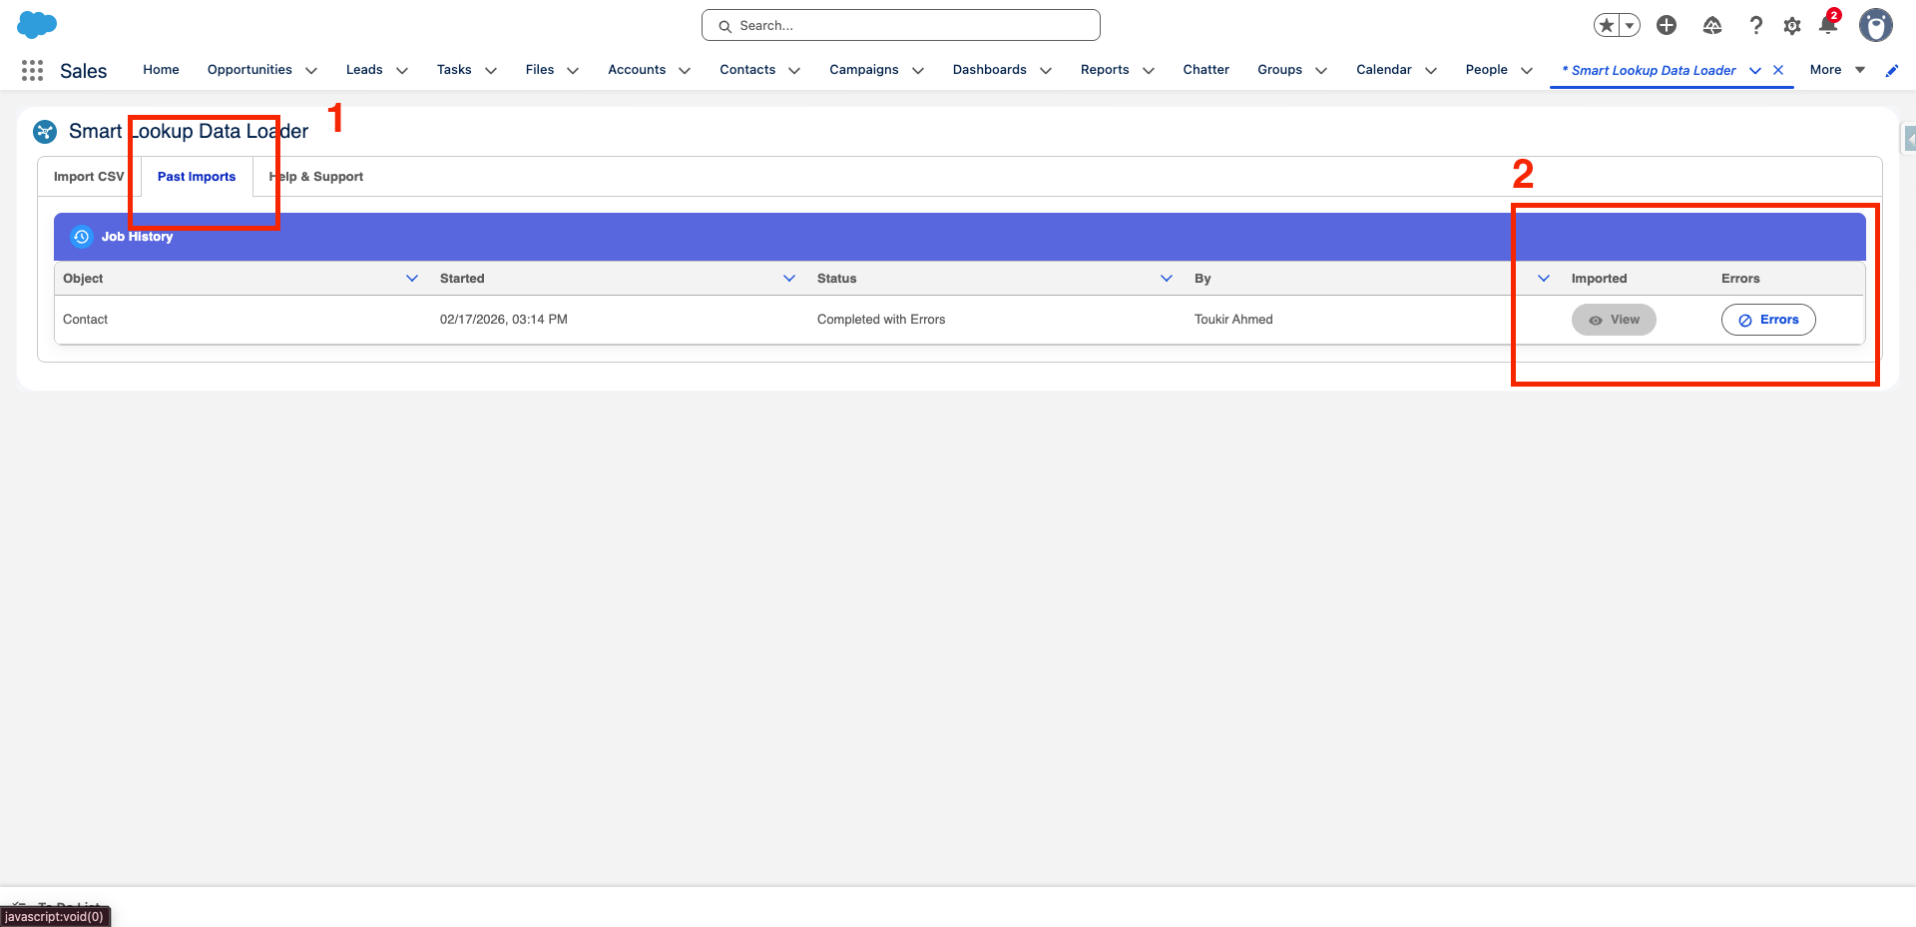
Step 6: Review the Import History
Once the import has been done, you may go to the Import History tab and view your import logs. The section is a detailed record of all the imports, their status (successful or not), the object imported, and any errors experienced in the process.
It is easy to monitor the activity of importing that you had and troubleshoot the problem that might have arisen.
Key Benefits of Using Smart Lookup Data Loader
- Saves Time: Processes of importing, mapping, and updating data are all automated and save you hours of manual work.
- Minimizes Errors: Data validation and auto-mapping ensure that there is minimal likelihood of errors, making the importing experience smooth.
- Enhances Data Accuracy: Makes sure that your Salesforce data is accurate, up-to-date, and structured appropriately.
- No Complex Settings: You do not need any complicated settings to use; simply install, choose your object, and upload your CSV file.
- Free Forever: Best of all, Smart Lookup Data Loader is free and can be offered to any Salesforce user regardless of size.
Conclusion
Using Smart Lookup Data Loader, you will be able to say farewell to the tedious process of importing data manually and experience a better and quicker approach to importing your data to Salesforce. Be it a few records or a thousand, this tool will make it easy, and the data will be imported with ease and in the right manner.
Ready to get started?
Go to the AppExchange, install Smart Lookup Data Loader today, and begin importing your data with ease.
Get it on AppExchange